

Buying a high-quality Lithium Iron Phosphate (LiFePO4) battery is a massive upgrade over ancient, heavy lead-acid or standard lithium-ion blocks. Whether you are outfitting an off-grid solar bank, powering a high-performance electric bicycle, or setting up an RV backup system, LiFePO4 cells offer an incredible combination of safety, thermal stability, and deep cycle longevity. However, the first cycle is where many newcomers accidentally ruin their investment. Treating a brand-new chemical cells like a plug-and-play domestic appliance is a fast track to cell imbalance, reduced capacity, and a permanently diminished battery lifespan.
In most professional situations, the initial charge of a lithium iron phosphate battery dictates how cleanly the internal Battery Management System (BMS) calibrates its state-of-charge tracking. From our experience in advanced power electronics manufacturing, executing this phase incorrectly can permanently rob you of up to 10% of your total storage capacity from day one. This practitioner-level guide details five uncompromising tips you must follow when charging a Lithium Iron Phosphate (LiFePO4) Battery for the First Time to protect your investment and optimize its long-term performance.
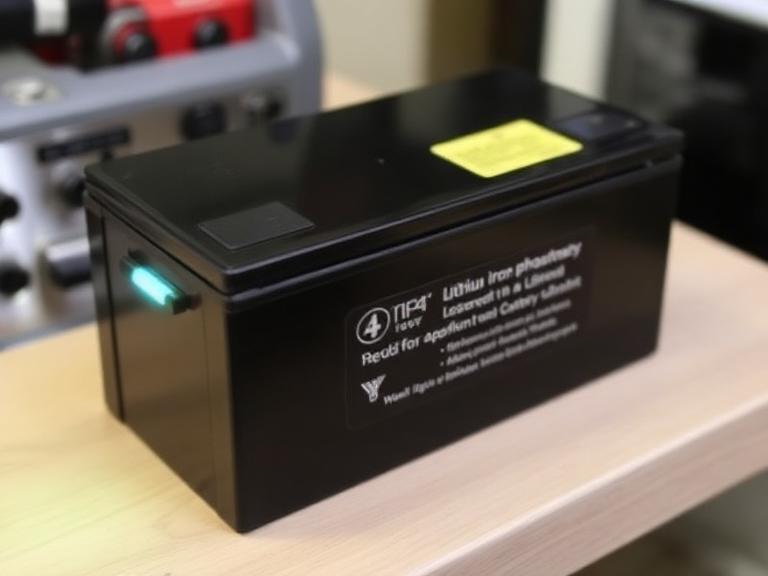
Quick Answer: How to Handle the First Charge
When executing the task of Charging a Lithium Iron Phosphate (LiFePO4) Battery for the First Time, you must follow three golden rules: first, use a dedicated charger featuring a specific LiFePO4 profile with a CC/CV (Constant Current/Constant Voltage) algorithm; second, charge the battery individually to 100% saturation at room temperature before linking it to other packs; third, allow the battery to sit on the charger for 2 to 4 hours after it reaches the full voltage threshold to let the internal BMS balance the individual cells. Never use a lead-acid charger with an automatic desulfation mode, as it will destroy the internal electronics. If you are preparing an assembly, ensure you utilize a certified LiFePO4 battery charger category supply to protect your hardware from over-voltage stress.
Table of Contents
- What is the First-Time Charge Process?
- How LiFePO4 Charging Mechanics Work
- Quick Summary Sizing and Parameter Table
- The 5 Essential Tips for Your First Charge
- Pros and Cons of Dedicated LiFePO4 Profiles
- Common Mistakes to Avoid
- Buying Considerations for Your Charger
- The OHRIJA Expert Recommendation
- Frequently Asked Questions (FAQ)
What is the First-Time Charge Process?
When a factory ships a LiFePO4 battery, it does not leave the production line at 100% capacity. International shipping and logistics regulations mandate that large lithium cells be transported at a partial state of charge—typically between 30% and 50%—to reduce chemical energy potential during transit. Consequently, when you open the box, the individual internal cells have spent months sitting in a semi-discharged state, causing subtle voltages differences among them.
The first-time charge is the process of bringing the entire array of internal cells up to a unified maximum voltage limit. It is not just about packing energy into the pack; it is a vital chemical initialization and calibration phase. If you bypass this step and immediately load the battery under a heavy commercial or recreational draw, the lowest-voltage cell in the series will hit its cutoff threshold prematurely, forcing the entire battery block to shut down early despite the other cells still possessing plenty of power.
How LiFePO4 Charging Mechanics Work
Unlike lead-acid variants that accept a floating, variable current, lithium iron phosphate chemistry relies on a strict multi-stage **Constant Current / Constant Voltage (CC/CV)** charging profile. In the first phase (Constant Current), the charger delivers its full rated amperage while the battery voltage steadily climbs. Once the battery hits its peak operational voltage—typically 14.6V for a standard nominal 12V pack—the charger switches seamlessly to the Constant Voltage phase.
During the CV phase, the voltage is locked in at the peak target, and the current (amperage) begins to drop. The battery absorbs the final, dense top-off energy. The process is fully complete only when the current tapers down to a microscopic level (usually below 5% of the initial charging rate). If you utilize an incorrect supply, such as an uncalibrated industrial unit or a cheap generic alternative, you miss this crucial saturation curve. For light micromobility assemblies, using a matched Li-ion battery charger category power supply is necessary for ternary setups, but true LiFePO4 chemistry requires an entirely separate, unique voltage ceiling.
Quick Summary Sizing and Parameter Table
Before initiating the initialization cycle, memorize these strict operational parameters to avoid over-stressing your new cells:
| Battery Nominal Configuration | Ideal First Charge Voltage | Recommended Charger Profile | BMS Calibration Sit Time |
|---|---|---|---|
| 12V Pack (4 Cells in Series) | 14.6V | Dedicated CC/CV LiFePO4 Only | 2 to 4 Hours at Full Charge |
| 24V Pack (8 Cells in Series) | 29.2V | Dedicated CC/CV LiFePO4 Only | 2 to 4 Hours at Full Charge |
| 48V Pack (16 Cells in Series) | 58.4V | Dedicated CC/CV LiFePO4 Only | 4 Hours at Full Charge |
The 5 Essential Tips for Your First Charge
1. Never Use a Lead-Acid Charger with an Automated Desulfation Mode
In most professional situations, trying to reuse your old smart automotive charger for a modern LiFePO4 battery is an expensive mistake. Lead-acid chargers are engineered with multi-stage profiling that frequently includes a high-voltage “desulfation” or “equalization” phase. This phase pulses voltages up to 15.5V or even 16V into the battery to break up lead sulfate crystals. If a lead-acid charger unleashes this high-voltage pulse into a lithium pack, the over-voltage will either trigger the internal BMS to lock up permanently in protection mode, or it will severely crack the internal separators of the cells. We recommend investing exclusively in a dedicated power electronic circuit that lacks a desulfation stage.
2. Top-Off Charge Individually Prior to Series or Parallel Assembly
If you bought multiple 12V LiFePO4 batteries to build a larger 24V or 48V bank for heavy-duty applications, do not wire them together straight out of the box. From our experience, even batteries from the exact same production lot can arrive with varying states of charge. If you wire them in series immediately, the voltage discrepancies will cause severe imbalances that the internal BMS modules cannot keep up with under load. Take the time to charge every single pack to 100% individually first. This establishes an identical baseline across all units, ensuring your entire system balances flawlessly once connected.
3. Allow Ample “Soak Time” for BMS Cell Balancing
When Charging a Lithium Iron Phosphate (LiFePO4) Battery for the First Time, the green indicator light on your charger does not mean you should instantly unplug the cable. The internal BMS balances cells via top-balancing passive resistance, meaning it bleeds off energy from the highest-voltage cells once they hit the 14.6V limit, allowing the trailing, lower-voltage cells to catch up. This process is slow, operating at low currents. Leave the battery connected to your charger for an additional 2 to 4 hours after the charger signals completion. This prolonged saturation phase allows the passive balancers to align every internal cell perfectly.
4. Respect Thermal Limits: Never Charge Below Freezing
Lithium iron phosphate is incredibly robust, but it has a definitive structural flaw: it cannot accept a charge at temperatures below freezing (0°C or 32°F). Attempting to charge a cold LiFePO4 cell causes a permanent chemical failure known as lithium plating. The lithium ions fail to intercalate correctly into the carbon anode, instead forming solid metallic lithium layers on the anode surface, which leads to internal micro-short circuits. For beginners setting up their equipment in unheated garages or cold winter workshops, verify the core ambient temperature of your room is at least 10°C (50°F) before turning on the power supply.
5. Ensure Your Charger Matches the Battery Capacity and Amperage Limits
While LiFePO4 can handle higher currents than old lead batteries, over-forcing current during the initialization phase can over-stress a cold cell matrix. Check the manufacturer’s maximum charging current recommendation. For example, if you are initializing a compact or highly specific mobile configuration, look at our dedicated 24V lithium battery charger 10A unit which provides an exceptionally smooth and safe current limit for medium-sized systems, preventing localized thermal spikes within individual cell structures.
Pros and Cons of Dedicated LiFePO4 Charging Profiles
| Advantages of Dedicated CC/CV Profiles | Risks of Using Subpar/Lead-Acid Chargers |
|---|---|
| Guarantees precise 14.6V ceiling, preventing cell gas venting. | High-voltage pulses can permanently scorch internal BMS control circuits. |
| Facilitates complete top-balancing of individual internal cells. | Incomplete charging saturation robs you of up to 10% of structural capacity. |
| Drastically extends overall cell life toward 3,000+ deep cycles. | Floating voltage profile will continuously cook the battery, causing accelerated aging. |
Common Mistakes to Avoid
The single most destructive error operators commit is abandoning their system during its first operational initialization. If you have connected your system incorrectly, or if a cell has shifted during ocean transit, the BMS may trigger a thermal disconnect. In our testing, always monitor the terminal temperature using an infrared thermometer during the first 30 minutes of the Constant Current phase. The battery should remain cool or slightly warm to the touch; if you detect any localized hot spots exceeding 50°C (122°F), terminate the power cycle immediately.
Another common mistake is trying to troubleshoot a charger that refuses to output voltage to a completely flat battery. Many modern smart lithium packs feature a low-voltage cutoff that turns off the terminals entirely if the voltage drops too low. If your charger requires a baseline terminal voltage reading before it activates, it will sit dormant. If you encounter this issue, learning how to troubleshoot a 12V battery charger can help you understand how to force a low-voltage wake-up pulse safely.
Buying Considerations for Your Charger
When selecting your power electronics, prioritize safety certifications (UL, CE, RoHS) and thermal architecture. For commercial users and industrial setups, a cheap, fanless plastic box will overheat and degrade its current output quickly. Look for aluminum alloy enclosures with integrated cooling fans that maintain constant current output over multi-hour saturation cycles.
Comparison Table: Choosing Your Power Supply Format
| Power Source Type | Precision Level | Best Applied Scenario | Safety Rating |
|---|---|---|---|
| Dedicated Smart LiFePO4 Charger | Maximum (Hardcoded Limits) | Everyday consumers, RVs, and marine setups. | Fail-safe automated cutoff. |
| Bench-Top Laboratory Supply | High (Manually Variable) | Engineering R&D and advanced diagnostic cell waking. | Requires continuous manual configuration. |
| Generic Industrial Switching Supply | Moderate (Fixed Voltage) | Fixed automation racks and commercial sub-assemblies. | Requires independent fuse integration. |
For custom industrial builds requiring absolute raw power distribution alongside a steady, regulated voltage feed, smart designers often source heavy-duty modular components from a certified adjustable power supply manufacturer to create specialized bench testing systems. If your project demands bulk power in a fixed format, a heavy-duty 12V 50A power supply 600W can act as an exceptional fixed-source feeder for multi-bank balance benches, provided your external control circuitry is configured correctly.
The OHRIJA Expert Recommendation
Advanced Power Electronics Solutions by OHRIJA
The OHRIJA brand belongs to Dongguan Hengruihong Technology Co., Ltd., which was established in 2020 and is headquartered in Dongguan, Guangdong Province, China. Our company is a high-tech enterprise integrating R&D, production, and sales. The company’s main products include: lithium battery chargers, lithium iron phosphate battery chargers, lead-acid battery chargers, golf cart chargers, power adapters, switching power supplies, and other advanced products.
Our Direct Guidance: For standard 12V marine or off-grid batteries, we strongly advise against under-powered generic chargers that drag out the initialization phase over 24 hours. We recommend upgrading your bench setup to our heavy-duty 12V LiFePO4 battery charger 30A. It delivers clean, high-amperage current during the CC phase, and transitions to a precise 14.6V ceiling to allow the internal BMS to balance individual cells efficiently. It pays for itself by maximizing your battery’s cycle life from day one.
Furthermore, if your engineering requirements span micro-mobility vehicles or fast electric commuter infrastructure, sourcing components from an integrated electric bicycle charger supplier ensures you can match your voltage requirements correctly across any configuration. This includes specialized systems such as a 54.6V 5A eBike battery charger or a high-capacity 48V 10A eBike charger for high-drain daily transits. For intense high-voltage commuter applications, high-power solutions like our 67.2V scooter battery charger or our top-tier 84V electric scooter charger offer unparalleled thermal regulation for complex high-cell packs, ensuring safety across all parameters.
Frequently Asked Questions (FAQ)
Can I use a regular lead-acid trickle charger on my new LiFePO4 battery?
Absolutely not. Regular lead-acid chargers utilize different voltage algorithms and frequently contain an automated desulfation or equalization phase that forces high-voltage spikes into the battery. This can destroy the internal electronics of a lithium pack or degrade the cells. Always use a charger with a dedicated LiFePO4 profile.
Why is my brand-new LiFePO4 battery reading zero volts at the terminals?
In most professional situations, a zero-volt reading indicates that the internal Battery Management System (BMS) has entered its low-voltage protection mode due to over-discharge during shipping or storage. To fix this, you need a smart charger equipped with a lithium wake-up or “0V activation” function that sends a gentle voltage pulse to re-activate the BMS circuit.
Is it safe to leave a LiFePO4 battery on the charger permanently?
While a dedicated smart charger will turn off automatically once it detects a full charge, we do not recommend leaving a lithium iron phosphate battery connected to a live charger for months on end. For long-term seasonal storage, it is best to charge the battery to roughly 50% to 60% capacity, disconnect it completely, and store it in a cool, dry room.
How long does the first-time cell balancing phase take?
Depending on how long the battery sat in a warehouse and how imbalanced the cells became during transit, the top-balancing phase can take anywhere from 2 to 6 hours after the charger indicates a full 100% capacity. Leaving the battery connected allows the passive BMS balancers to align cell voltages efficiently.
Authoritative References & Engineering Standards
To cross-reference lithium battery parameters and charging safety regulations, consult these industry standards: